Creating great appointment booking forms using WordPress.
Through the iCal link available for each calendar in the list of appointment calendars you can easily have automatically exported the appointments/bookings to your Google Calendar, iPhone Calendar, iPad calendar, Outlook calendar or other third party calendars.
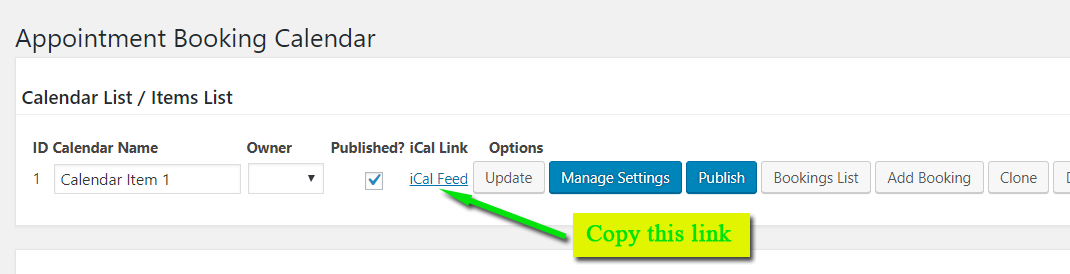
The first step to get the plugin bookings exported to a third party calendar is to get the iCal link. The iCal link is available in the list of calendars as displayed in the following image.
An easy way to copy the link is to right-click it and copy the URL. Right click the "iCal" link on the calendar list and click "Copy Link Address" or "Copy Link Location" (depending of the browser you are using).
The following image shows the exact location of the iCal link:
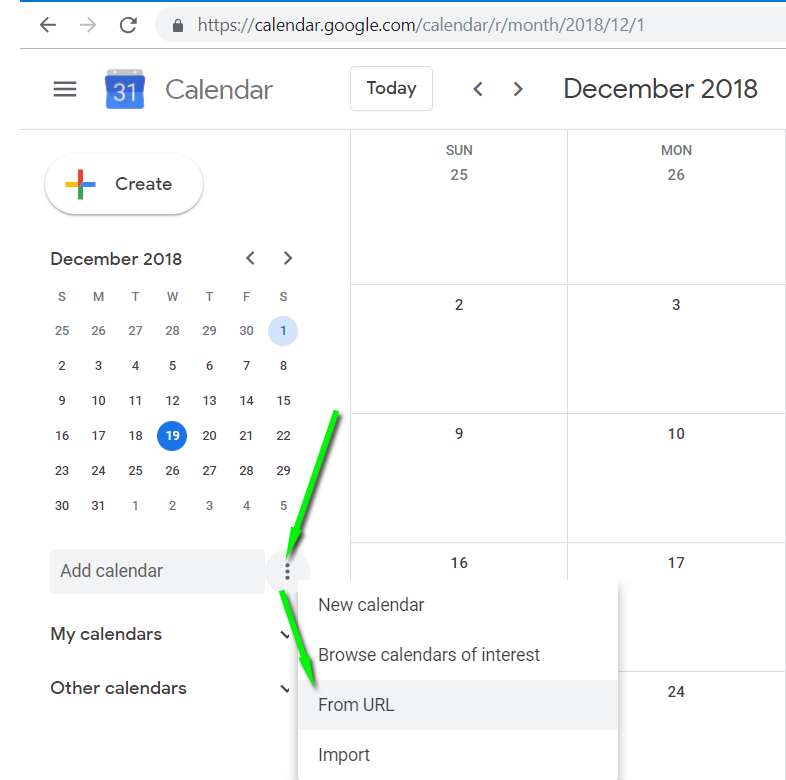
Now lets see how you can integrate the link to some of the most popular calendars.
1- Go to calendar.google.com
2- On the left, above "My Calendars," click Add Add and then From URL:
3- Enter the calendar's address in the field provided.
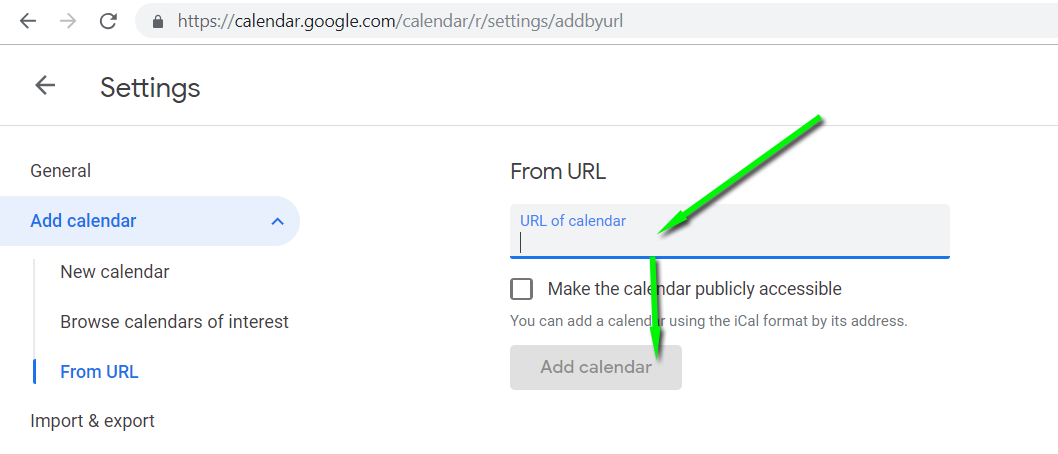
4- Click Add Calendar. The calendar will appear on the left side under "Other calendars."
Note: In some cases it might take some hours for changes to show in your Google Calendar.
The following screenshots and steps are primary for iOS 11 devices, but similar steps (with the access through different menus in some cases) are available for other iOS versions.
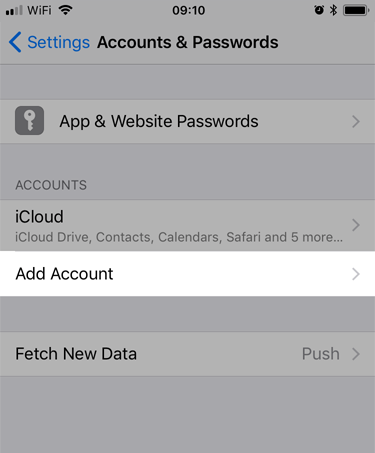
1- Go to the Settings on your iPhone/iPad.
2- Scroll to Accounts & Passwords.
3- Under Accounts tap on Add Account:
4- Choose Other from the options:

5- Choose **Add Subscribed Calendar: **
6- Enter the URL you copied earlier from the list of calendars.
7- Click Next (it will take a moment for the calendar to verify).
8- Once verified, your device will ask for further information (e.g., Username, Password), leave these blank.
9- Hit Next again and then Save.
10- Go back to your home screen and go into your calendar. Your subscribed calendar should now appear.
11-If it doesn't, click Calendars and choose it from the list.
The process for exporting the bookings to Outlook calendars is decribed in detail in the following page: Import to a calendar in Outlook.
Feedback about these features will be welcome, feel free to open a support ticket for any question.